How to Teach Your Teen to Drive
First step!
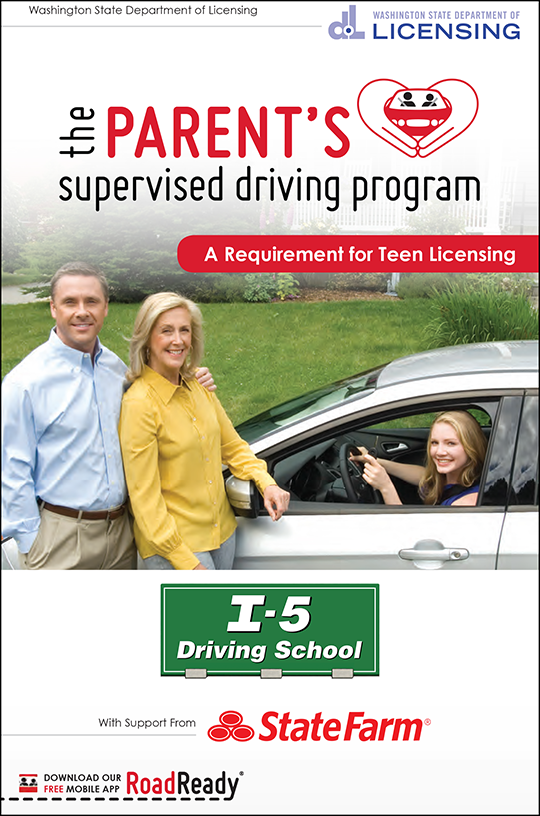
We recommend downloading the free Parent's Supervised Driving Program booklet produced by the Washington State Department of Licensing and supported by State Farm Insurance. This booklet covers a lot of the basics in helping your teen learn to drive, especially if you haven't taught someone how to drive before.
Our job is to do the heavy lifting and introduction to driving skills, while your teen will rely on you to help them practice and reinforce those skills.
We just got the permit. Now what?
Go over the basic controls of the car, and practice two verbal commands with your teen.
• "Stop" means to stop the car completely.
• "Slow down" means take your foot off of the gas pedal, and start applying the brake.
Be sure you use the correct term for your situation! These are the two biggest phrases you'll need in the beginning, and practice them before you start driving on the roads. You are watching to see that they are moving their foot to the correct pedal, and have it become an automatic reaction. When you say the phrase "Slow down" their foot should immediately move to the brake pedal.
We've noticed over the years that new drivers often want to see why they should slow down before actually touching the brake. Having driven for many years, you can already predict a problem occurring, whereas a new driver cannot make these predictions yet.
If you are worried about being able to take control of the car, download a free PDF of our brief training introduction for new driving instructor trainees, entitled "Taking Control of the Car". It's just two pages, but is a helpful starter piece to learning how we prepare to take control if the student gets into a bad situation.
Where should we start practicing?
Parking lots are a great place to introduce the gas and brake pedals, plus steering (we recommend “hand over hand” steering), turning, acceleration and braking. Once your student is able to make left turns/right turns and stop on command, consider moving your practice to a neighborhood. We suggest neighborhoods with wider (not narrow) streets to start. Once they are ready to venture out of the neighborhoods, introduce them to driving on side streets, or areas of light traffic.
When you have them make left/right turns, have them slow down to 12mph before they start turning the wheel. 8mph is too slow, and 16mph is too fast (but at this stage, a little slower is OK). During the turn, you want to be off the brake and off the gas pedal completely. Once you start unwinding the wheel (in the last part of the turn), gently apply pressure to the gas pedal.
I'm nervous about driving on the roads.
Some anxiety is necessary when driving, but you don't want it to overwhelm you. There are three basics to remember when driving on public roads for the first time:
#1 - Stay in your lane: Coach your teen to always stay in their lane, and don't have them change lanes or turn without your help first.
#2 - Stay away from the car in front of you: You want to stay at least 4 seconds away from the car in front of you. That means when the car ahead of you passes by a street sign (for example), you should reach that street sign 4 seconds later.
#3 - Stop when the lights are red or at a stop sign: The part of the brain that helps humans determine when to start slowing down as we are approaching a stop situation is not developed until our early 20s. This means you'll have to help your teen determine when to start slowing down, and coach them to look for stop situations and start slowing down waaaaay earlier than they want to.
This all sounds a bit simplistic, but the majority of your driving time requires these three skills. You'll help them with right-of-way situations and left/right turns as they occur.
How do the driving instructors learn to teach?
While we can't include all of our training materials here, we can certainly give you a few of the basics! We teach our instructors to be proactive, and to help set up the scenario for the student. We analyze the scene at least 5 seconds ahead to give instruction to the student, which helps if you are familiar with the roads you are driving on. Below is an example:
Example scenario:
You’re in the right lane, when the “Right Lane End” sign appears. You might say something like:
• “See the warning sign? What do we do here?”
• If student isn’t sure, say “Your lane is ending, what do you do?”
• If student still isn’t sure, say “We must change lanes to the left, remember to use Signal 1-2-3. Use your left turn signal, check rear view mirror, left side mirror, and look over your left shoulder before moving"
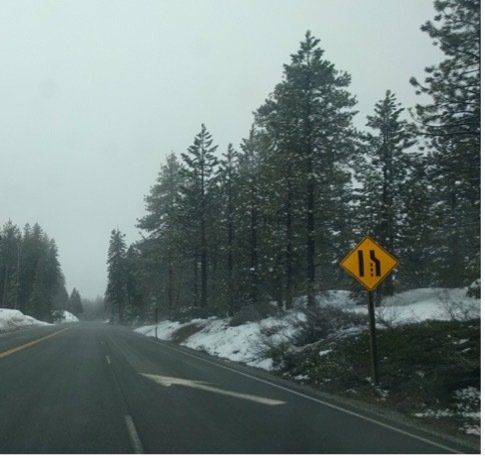
In this example, you have prompted them to recognize the scene for next time. We started out asking them if they recognize what to do (some students do, many don’t). Guide them through the steps the first time, then try to get in a 2nd repetition so they can perform it on their own.
Reactive teaching is where you are already too far into this lane before prompting the student. At that point you are forced to simply help them change lanes and the student has learned very little. When training, our goal is to be proactive teachers most of the time. We must recognize scenarios with enough time to give the student some verbal cues and help them decide.
Did you miss the Parent Session?
You can view a previous recording of the Parent Session on YouTube in the window on this page. This is the 1-hour long session that is part of the fourth classroom session for students.
Sometimes parents aren't able to make it, and that's OK! This session is offered 24 hours a day on YouTube for free. There's no attendance credit given, but all of the information is available.
If you would prefer to view this on a different device or within the YouTube app, you can use the following link: https://www.youtube.com/watch?v=XtNq0lXT4Q0